最近某度新闻有点多,先是报警把PanDownload下载器作者给抓了,后来又被曝出云盘在用户不知情的情况下默认开启宽带共享,偷别人宽带当免费下载节点。干脆蹭个热点,写一个自建私有云盘的教程(不管是个人使用还是公司使用均是不错的选择),这样至少在条件允许的情况下可以多一个选择。
* 先写一篇Seafile的,NextCloud的教程再看情况。
* 如果觉得这篇教程阅读体验不佳,可以直接参考官方文档
https://cloud.seafile.com/published/seafile-manual-cn/home.md (服务器搭建手册)
https://cloud.seafile.com/published/seafile-user-manual/home.md (用户使用手册)
一、环境介绍
- 操作系统:Ubuntu 18.04
- IP:192.168.3.11
- 数据库:MariaDB 10.1.44 (虽然也支持SQLite,但还是推荐用MySQL,SQLite在这个场景下略显单薄)
- App环境:Python 3.6 + Seafile 7.1.3(Seafile 7.0.x依赖python2)
- Web发布:Nginx 1.14
二、MariaDB安装、数据库准备
- 更换apt源:将 /etc/apt/source.list 这个文本文件的内容替换,然后执行 apt update和apt upgrade;
deb http://mirrors.aliyun.com/ubuntu/ bionic main restricted universe multiverse
deb http://mirrors.aliyun.com/ubuntu/ bionic-security main restricted universe multiverse
deb http://mirrors.aliyun.com/ubuntu/ bionic-updates main restricted universe multiverse
deb http://mirrors.aliyun.com/ubuntu/ bionic-proposed main restricted universe multiverse
deb http://mirrors.aliyun.com/ubuntu/ bionic-backports main restricted universe multiverse
deb-src http://mirrors.aliyun.com/ubuntu/ bionic main restricted universe multiverse
deb-src http://mirrors.aliyun.com/ubuntu/ bionic-security main restricted universe multiverse
deb-src http://mirrors.aliyun.com/ubuntu/ bionic-updates main restricted universe multiverse
deb-src http://mirrors.aliyun.com/ubuntu/ bionic-proposed main restricted universe multiverse
deb-src http://mirrors.aliyun.com/ubuntu/ bionic-backports main restricted universe multiverse- 使用apt 安装mariadb-server(安装后,可以按需添加对mariadb配置进行修改,比如lower_case_table_names)
sudo apt install mariadb-server
# 此处按需调整配置
sudo systemctl enable mariadb- 创建所需数据库(也可以在安装Seafile的时候利用安装程序创建)
create database `ccnet` character set = 'utf8';
create database `seafile` character set = 'utf8';
create database `seahub` character set = 'utf8';
grant all privileges on `seahub`.* to 'seafile'@'127.0.0.1' identified by 'seafile';
grant all privileges on `seafile`.* to 'seafile'@'127.0.0.1' ;
grant all privileges on `ccnet`.* to 'seafile'@'127.0.0.1' ;
三、Seafile安装
- 下载Seafile最新版安装包(当前教程为7.1.3),并解压到/opt/ seafile-server-7.1.3目录(下载地址:https://www.seafile.com/download/)
- 安装Python3环境、以及必备的几个包(如果是7.0.x,python依赖为2.7):
sudo apt-get install python3 python3-setuptools python3-pip python3-ldap -y
sudo pip3 install --timeout=3600 Pillow pylibmc captcha jinja2 sqlalchemy psd-tools django-pylibmc django-simple-captcha -i http://mirrors.aliyun.com/pypi/simple --trusted-host mirrors.aliyun.com- 执行/opt/seafile-server-7.1.3/setup-seafile-mysql.sh,安装Seafile,安装过程中按提示输入相关信息即可(因为数据库之前已经提前创建好,所以我选了Use existing ccnet/seafile/seahub databases这一项。安装完成后,核心服务 seahub的默认端口为8000,文件seafile默认端口为8082;同时,在同级目录下还会生成一个seafile-server-latest的软链接,指向seafile-server-7.1.3。
/opt/seafile-server-7.1.3/setup-seafile-mysql.sh
Checking python on this machine ...

-----------------------------------------------------------------
This script will guide you to setup your seafile server using MySQL.
Make sure you have read seafile server manual at

        https://download.seafile.com/published/seafile-manual/home.md

Press ENTER to continue
-----------------------------------------------------------------


What is the name of the server? It will be displayed on the client.
3 - 15 letters or digits
[ server name ] mycloud

What is the ip or domain of the server?
For example: www.mycompany.com, 192.168.1.101
[ This server's ip or domain ] yun.chenxin.info

Which port do you want to use for the seafile fileserver?
[ default "8082" ]

-------------------------------------------------------
Please choose a way to initialize seafile databases:
-------------------------------------------------------

[1] Create new ccnet/seafile/seahub databases
[2] Use existing ccnet/seafile/seahub databases

[ 1 or 2 ] 2

What is the host of mysql server?
[ default "localhost" ] 127.0.0.1

What is the port of mysql server?
[ default "3306" ]

Which mysql user to use for seafile?
[ mysql user for seafile ] seafile

What is the password for mysql user "seafile"?
[ password for seafile ]

verifying password of user seafile ...  done

Enter the existing database name for ccnet:
[ ccnet database ] ccnet

verifying user "seafile" access to database ccnet ...  done

Enter the existing database name for seafile:
[ seafile database ] seafile

verifying user "seafile" access to database seafile ...  done

Enter the existing database name for seahub:
[ seahub database ] seahub

verifying user "seafile" access to database seahub ...  done

---------------------------------
This is your configuration
---------------------------------

    server name:            mycloud
    server ip/domain:       yun.chenxin.info

    seafile data dir:       /opt/seafile-data
    fileserver port:        8082

    database:               use existing
    ccnet database:         ccnet
    seafile database:       seafile
    seahub database:        seahub
    database user:          seafile


---------------------------------
Press ENTER to continue, or Ctrl-C to abort
---------------------------------
- 添加systemd服务
# vi /etc/systemd/system/seafile.service

[Unit]
Description=Seafile
After=network.target
[Service]
Type=oneshot
ExecStart=/opt/seafile-server-latest/seafile.sh start
ExecStop=/opt/seafile-server-latest/seafile.sh stop
RemainAfterExit=yes
User=root
Group=root
[Install]
WantedBy=multi-user.target
# vi /etc/systemd/system/seahub.service
[Unit]
Description=Seafile hub
After=network.target seafile.service
[Service]
ExecStart=/opt/seafile-server-latest/seahub.sh start
ExecStop=/opt/seafile-server-latest/seahub.sh stop
User=root
Group=root
Type=oneshot
RemainAfterExit=yes
[Install]
WantedBy=multi-user.target- 开启服务并添加管理员
systemctl start seafile seahub
systemctl enable seafile seahub

/opt/seafile-server-latest/reset-admin.sh
四、Nginx发布:
- 作为文件服务器,经常需要上传下载较大的文件,所以还要设置client_max_body_size参数,其数值应以满足实际需求为前提,尽可能小。
server {
    listen 80;
    server_name seafile.example.com;
    proxy_set_header X-Forwarded-For $remote_addr;
    client_max_body_size 200m;
    location / {
         proxy_pass         http://127.0.0.1:8000;
         proxy_set_header   Host $host;
         proxy_set_header   X-Real-IP $remote_addr;
         proxy_set_header   X-Forwarded-For $proxy_add_x_forwarded_for;
         proxy_set_header   X-Forwarded-Host $server_name;
         proxy_read_timeout  1200s;
         access_log      /var/log/nginx/seahub.access.log;
         error_log       /var/log/nginx/seahub.error.log;
    }

    location /seafhttp {
        rewrite ^/seafhttp(.*)$ $1 break;
        proxy_pass http://127.0.0.1:8082;
        proxy_set_header   X-Forwarded-For $proxy_add_x_forwarded_for;
        proxy_connect_timeout  36000s;
        proxy_read_timeout  36000s;
        proxy_send_timeout  36000s;
        send_timeout  36000s;
    }

    location /media {
        root /opt/seafile-server-latest/seahub;
    }
}- 本机修改hosts,添加seafile站点的域名(内网生产环境中使用时,在dns服务器中添加指向内网IP的解析记录;在公网环境使用时,在dns管理后台添加指向公网IP的解析记录)
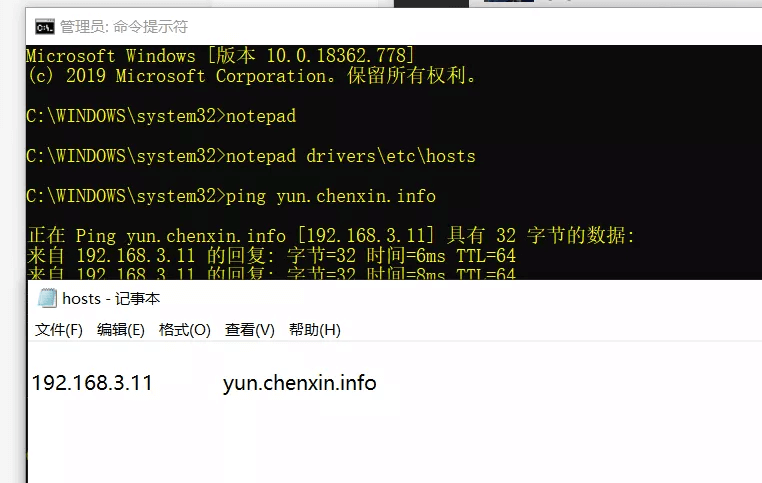
- 以管理员身份登录网站,修改SERVICE_URL和FILE_SERVER_ROOT两个配置项为实际的值:
SERVICE_URL: http://yun.chenxin.info
FILE_SERVER_ROOT: http://yun.chenxin.info/seafhttp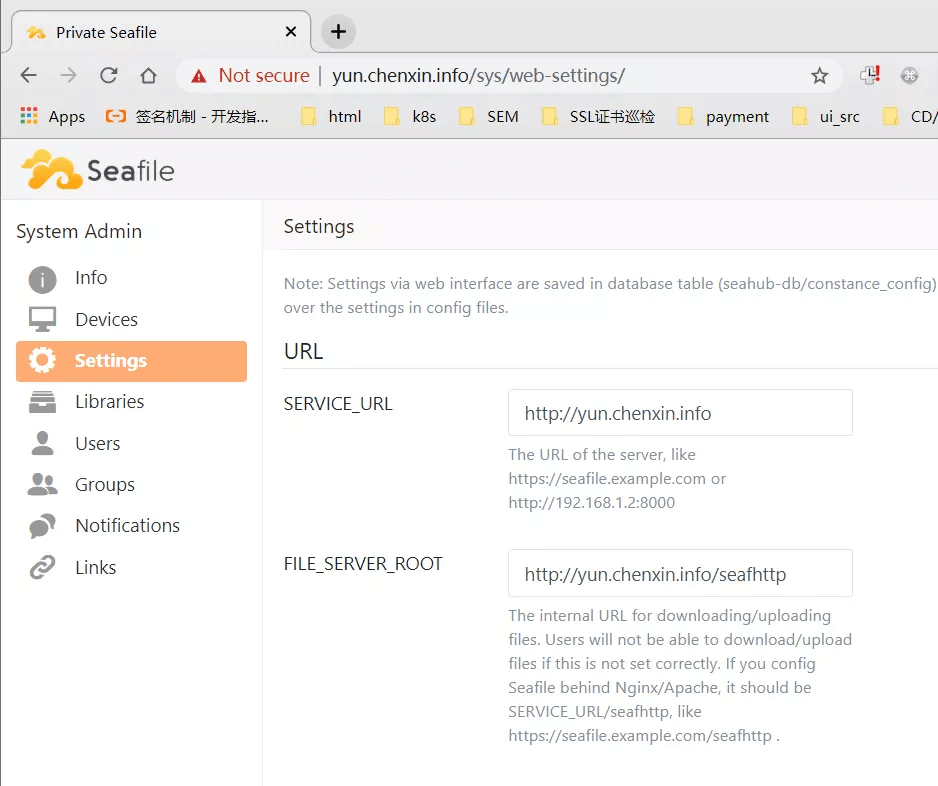
五、客户端
- 服务器配置、人员/分组/库/文件/共享管理都在网页上进行,以管理员身份登录即可进行设置;
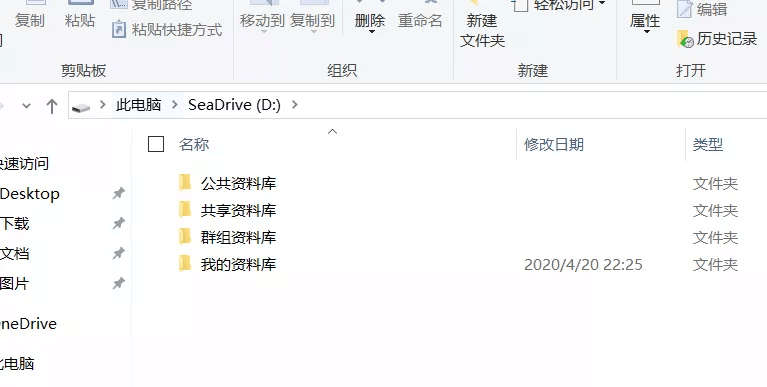
- 关于库:
- 每个用户都有一个自己的库;
- 可以为用户、组创建库,并设置相应权限;
- 用户可用库 = 私有库 + 所属群组拥有的库 + 被分享给账号的库 + 被分享给所属群组的库;
- 库可以分享给用户或组,同时也可以设置被分享对象的操作权限。
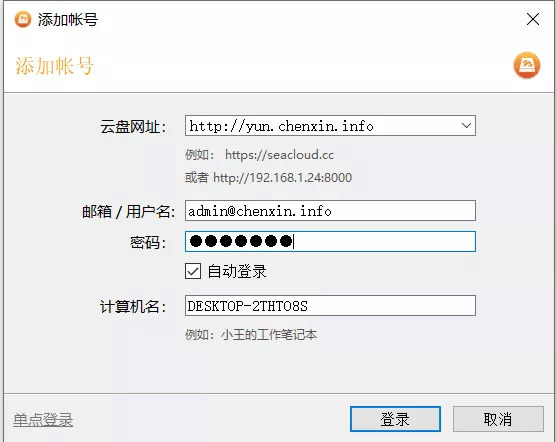
- 客户端仍然在https://www.seafile.com/download/下载;
- 桌面同步客户端可提供离线编辑、文件同步、本地目录映射等所有管理功能;
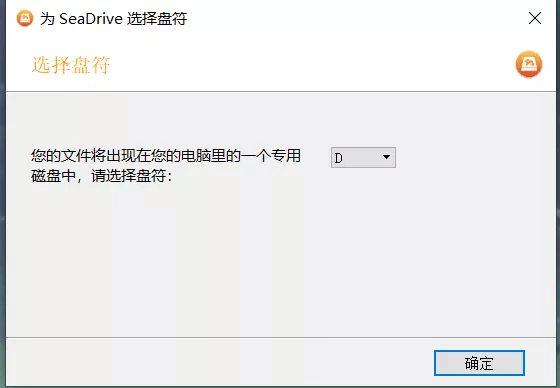
- 挂载盘客户端用于网盘挂载,以一种不占用本地磁盘空间的方式直接将服务器上的库映射到本地虚拟磁盘。