NextCloud和之前介绍过的seafile一样(搭建属于自己的网盘 – Seafile),也是一套私有云盘平台,其前身是OneCloud。相比于seafile,nextcloud多了一个应用市场,功能更丰富。从软件构成上来看, seafile包含:seafile、seahub、ccent三个服务,以及web端;nextcloud所有功能都在web端。
nextcloud官方网址:https://nextcloud.com/

一、环境介绍
- 操作系统:Ubuntu 18.04
- IP:192.168.2.72
- 数据库:MariaDB 10.1.44
- App环境:PHP7.4
- Web发布:Nginx 1.14
二、环境准备
- 添加PHP的PPA源
apt install software-properties-common
add-apt-repository ppa:ondrej/php
apt update -y- 安装Nginx、Mariadb、PHP7.4
apt install nginx mariadb-server php7.4-cli php7.4-fpm php7.4-gd php7.4-json php7.4-mysql php7.4-curl php7.4-mbstring php7.4-intl php-imagick php7.4-xml php7.4-zip php-bcmath php7.4-gmp php7.4-bz2- 修改mariadb设置,并创建数据库
# /etc/mysql/mariadb.conf.d/50-server.cnf

#create database
create database cloud default charset utf8mb4 collate utf8mb4_general_ci;
grant all privileges on cloud.* to 'cloud'@'localhost' identified by '123456';- 修改php
# fpm/php.ini 和 cli/php.ini都改
date.timezone = Asia/Shanghai
cgi.fix_pathinfo=0
memory_limit=512M

opcache.enable=1
opcache.interned_strings_buffer=8
opcache.max_accelerated_files=10000
opcache.memory_consumption=128
opcache.save_comments=1
opcache.revalidate_freq=1
# fpm/pool.d/www.conf
env[HOSTNAME] = $HOSTNAME
env[PATH] = /usr/local/bin:/usr/bin:/bin
env[TMP] = /tmp
env[TMPDIR] = /tmp
env[TEMP] = /tmp
pm = dynamic
pm.max_children = 120
pm.start_servers = 12
pm.min_spare_servers = 6
pm.max_spare_servers = 18- nginx vhost
upstream php-handler {
  server unix:/run/php/php7.4-fpm.sock;
}

server {
  listen 80;
  server_name cloud.abc.com;
  return 301 https://$server_name$request_uri;
}

server {
  listen 80 http2;
  server_name cloud.abc.com;

  ssl_certificate keys/ssl.crt;
  ssl_certificate_key keys/ssl.key;

  add_header Strict-Transport-Security "max-age=15552000";
  add_header X-Frame-Options SAMEORIGIN;
  add_header X-Content-Type-Options nosniff;
  add_header X-XSS-Protection "1; mode=block";
  add_header X-Robots-Tag none;
  add_header X-Download-Options noopen;
  add_header X-Permitted-Cross-Domain-Policies none;

  root /var/www/nextcloud/;

  location = /robots.txt {
    allow all;
    log_not_found off;
    access_log off;
  }

  # The following 2 rules are only needed for the user_webfinger app.
  # Uncomment it if you're planning to use this app.
  #rewrite ^/.well-known/host-meta /public.php?service=host-meta last;
  #rewrite ^/.well-known/host-meta.json /public.php?service=host-meta-json

  location = /.well-known/carddav {
    return 301 $scheme://$host/remote.php/dav;
  }
  location = /.well-known/caldav {
    return 301 $scheme://$host/remote.php/dav;
  }

  # set max upload size
  client_max_body_size 512M;
  fastcgi_buffers 64 4K;

  # Enable gzip but do not remove ETag headers
  gzip on;
  gzip_vary on;
  gzip_comp_level 4;
  gzip_min_length 256;
  gzip_proxied expired no-cache no-store private no_last_modified no_etag auth;
  gzip_types application/atom+xml application/javascript application/json application/ld+json application/manifest+json application/rss+xml application/vnd.geo+json application/vnd.ms-fontobject application/x-font-ttf application/x-web-app-manifest+json application/xhtml+xml application/xml font/opentype image/bmp image/svg+xml image/x-icon text/cache-manifest text/css text/plain text/vcard text/vnd.rim.location.xloc text/vtt text/x-component text/x-cross-domain-policy;

  # Uncomment if your server is built with the ngx_pagespeed module
  # This module is currently not supported.
  #pagespeed off;

  location / {
    rewrite ^ /index.php$uri;
  }

  location ~ ^/(?:build|tests|config|lib|3rdparty|templates|data)/ {
    deny all;
  }
  location ~ ^/(?:\.|autotest|occ|issue|indie|db_|console) {
    deny all;
  }

  location ~ ^/(?:index|remote|public|cron|core/ajax/update|status|ocs/v[12]|updater/.+|ocs-provider/.+)\.php(?:$|/) {
    fastcgi_split_path_info ^(.+\.php)(/.*)$;
    include fastcgi_params;
    fastcgi_param SCRIPT_FILENAME $document_root$fastcgi_script_name;
    fastcgi_param PATH_INFO $fastcgi_path_info;
    fastcgi_param HTTPS on;
    #Avoid sending the security headers twice
    fastcgi_param modHeadersAvailable true;
    fastcgi_param front_controller_active true;
    fastcgi_pass php-handler;
    fastcgi_intercept_errors on;
    fastcgi_request_buffering off;
  }

  location ~ ^/(?:updater|ocs-provider)(?:$|/) {
    try_files $uri/ =404;
    index index.php;
  }

  # Adding the cache control header for js and css files
  # Make sure it is BELOW the PHP block
  location ~ \.(?:css|js|woff|svg|gif)$ {
    try_files $uri /index.php$uri$is_args$args;
    #add_header Cache-Control "public, max-age=15778463";
    #add_header Strict-Transport-Security "max-age=15768000; includeSubDomains; preload;";

    #add_header X-Content-Type-Options nosniff;
    #add_header X-XSS-Protection "1; mode=block";
    #add_header X-Robots-Tag none;
    #add_header X-Download-Options noopen;
    #add_header X-Permitted-Cross-Domain-Policies none;
    access_log off;
  }

  location ~ \.(?:png|html|ttf|ico|jpg|jpeg)$ {
    try_files $uri /index.php$uri$is_args$args;
    access_log off;
  }
}
三、安装NextCloud
- 下载web端:https://download.nextcloud.com/server/releases
- 解压到 /var/www/
- 修改目录权限
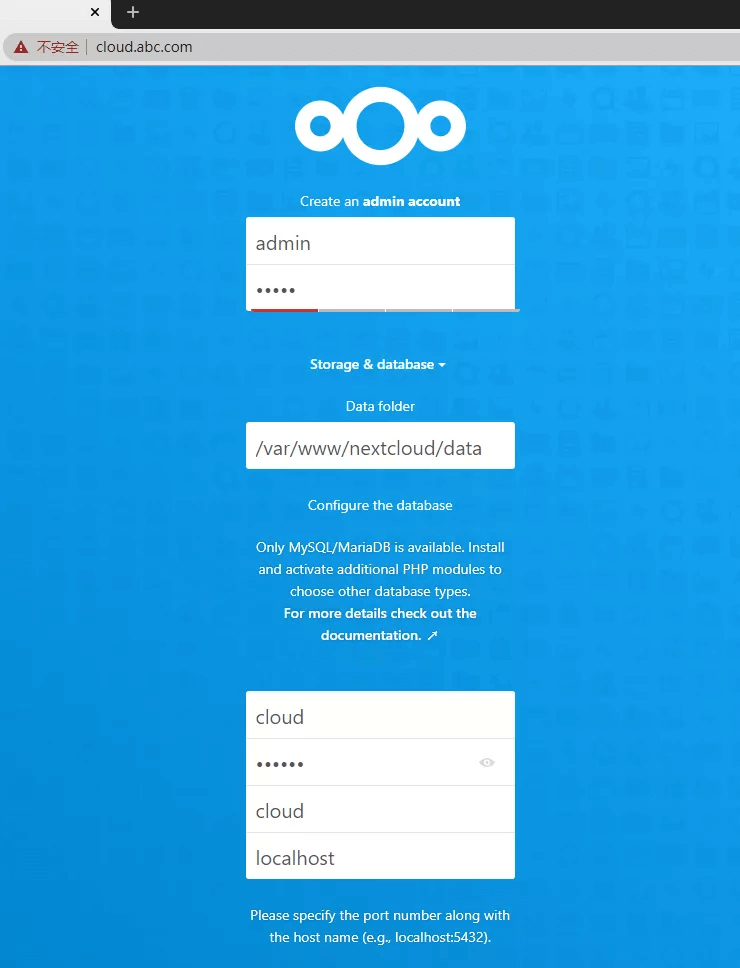
chown -R www-data:www-data /var/www/nextcloud- 访问站点,并设置初始化信息(管理员账号、密码,data目录位置,数据库连接信息)
- 服务开机启动
systemctl enable nginx mariadb php7.4-fpm四、后台设置
- 用户账号初始文件
nextcloud会为新用户准备几个示例目录和文件,如果不需要,可以到/var/www/nextcloud/core/skeleton目录下删掉 - 网站首页添加ICP信息
编辑/var/www/nextcloud/core/templates/layout.guest.php,在<footer>小节里按需添加相应内容
<footer role="contentinfo">
<p class="info">
<span><a href="http://www.beian.miit.gov.cn/" target="_blank">备案号</a></span>
</p>
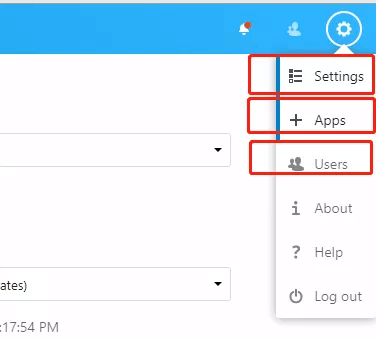
</footer>后台设置菜单主要用到三个,设置、用户、Apps
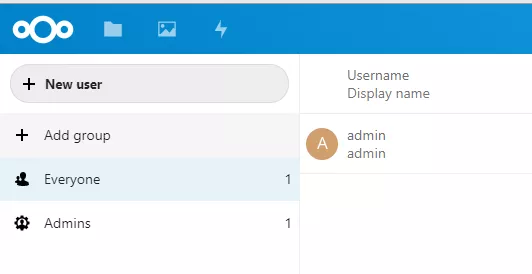
- 添加用户组和用户(从Users菜单进入)
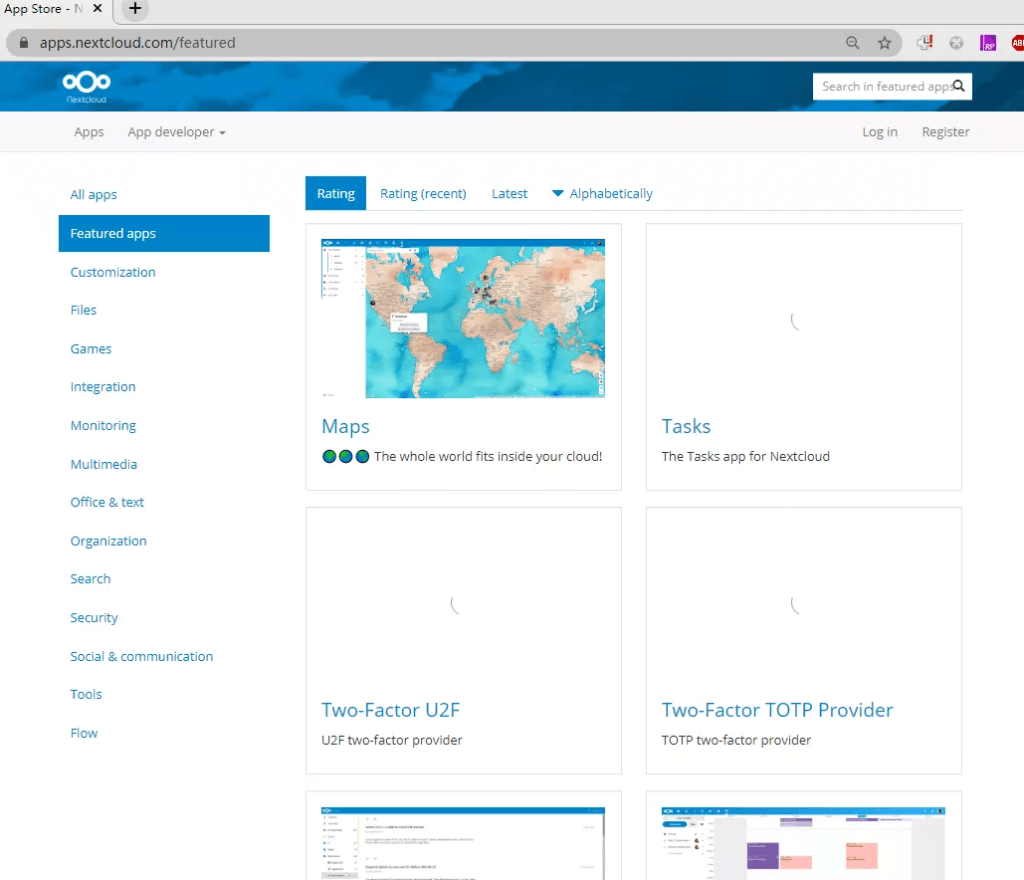
- 添加应用(从Apps菜单进入)
添加应用有两种方法,一种是直接从后台的Apps管理页面中打开应用商城进行添加,另一种是从https://apps.nextcloud.com/找到应用并下载对应版本的离线安装包,解压并上传到/var/www/nextcloud/apps目录。
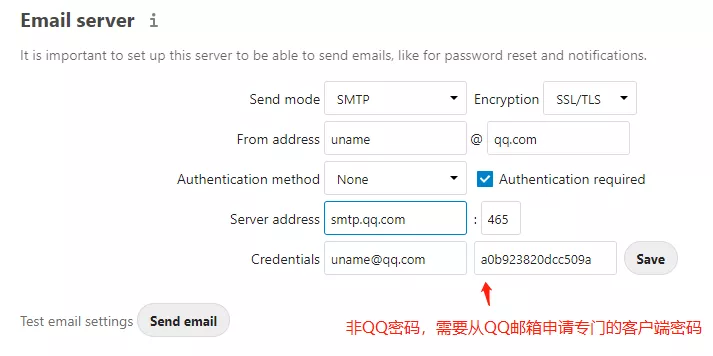
- 设置邮件服务器(从Settings进入,位于Administration -> Basic Settings,以QQ邮箱为例)
五、客户端
- 使用教程 https://docs.nextcloud.com/desktop/2.6
- Windows
https://download.nextcloud.com/desktop/releases/Windows/latest - Mac
https://download.nextcloud.com/desktop/releases/Mac/Installer/latest - Android
https://download.nextcloud.com/android/nextcloud-30020199.apk - iPhone
https://itunes.apple.com/us/app/nextcloud/id1125420102?mt=8
- Windows
- 连接服务器
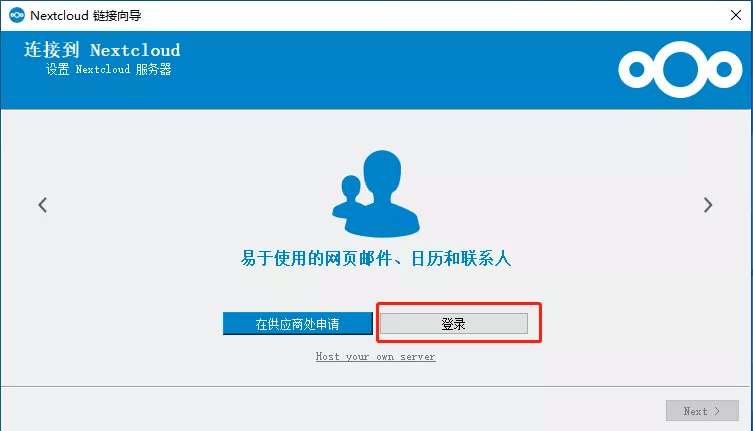
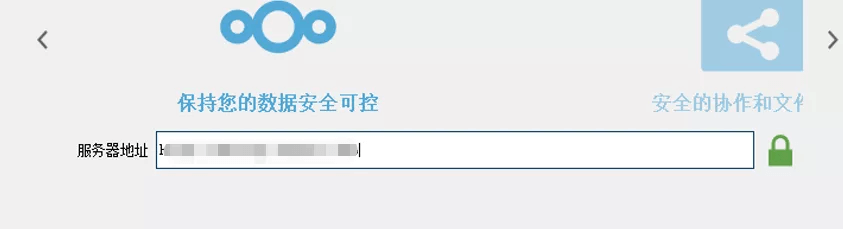
- 在“服务器地址”中输入 https://cloud.abc.com后,会自动打开“账号访问”网页,在弹出的网页中点击“授权访问”,此时即完成客户端授权。
- “设置本地文件”界面中,保持默认设置,软件将连接个人账号下的Nextcloud目录到服务器。
